安装更新
安装程序
使用 electron forge 或 electron-builder 都可以打包 electron 应用。
如果使用脚手架时,一般脚手架已经做好了打包配置,下面是介绍使用 electron-vite 脚手架开发的 electron 完成打包操作,他在内部使用 electron-builder 扩展进行打包操作。
electron-builder.yml 是打包的配置文件。
下面对常用配置项说明
- productName 为软件的名称,配置文件中可以使用
${productName}读取 - executableName 指 window打包后dist/win-unpacked 目录中的执行程序名称
变量
${productName}指 electron-builder.yml 配置文件中的 productName 值${name}指package.json 中的 name 值${version}指 package.json 中的 version 值
directories
打包图标等文件定义
- buildResources 图标文件存放目录
- output 指定打包文件输出目录
asarUnpack
asar 是一种将多个文件合并成一个文件的类 tar 风格的归档格式。 Electron 可以无需解压整个文件,即可从其中读取任意文件内容。可加快 require 速度,由于文件整合到一个 asar 文件,所以安装也会变快
该配置项用于设置哪些文件从 asar 中解压缩
files
相对于应用目录的 glob 模式 ,它指定在复制文件以创建包时要包含的文件
nsis
NSIS (Nullsoft Scriptable Install System) 是一个专业开源的制作 windows 安装程序的工具,下面对属性做个说明
- artifactName 设置window 安装程序的名称
- shortcutName 桌面快捷方式的名称
- uninstallDisplayName 设置 window 卸载程序时显示的名称,如在腾讯电脑管家中卸载时显示的名称
- createDesktopShortcut 是否创建桌面快捷方式
dmg
配置项中的 dmg 是苹果系统的安装配置
- artifactName 安装程序的名称
package.json
- name window 应用安装名称,不能是中文
- author 显示应用程序的作者和版权信息中显示(右键查看应用程序属性)
自动更新
使用软件的自动更新可以非常容易的对用户进行交付,使用自动更新可以修复软件的问题,让用户体验到最新的功能。自动更新过程是自动下载的,软件会向用户发送更新通知,用户确认后就可能自动安装软件的新版本了
electron 自动更新使用是非常简单的,下面我们来学习自动更新。
自动更新需要使用 electron-build 结合 electron-builder 包完成
pnpm add electron-updater打包生成的安装程序不要有空格,如果有空格需要使用 - 连接
配置文件
自动更新需要在 package.json 文件中添加 repository 配置段,指向到你的更新文件地址
{
  "name": "camera",
  "version": "1.0.0",
  "repository": "https://github.com/houdunwang/camera",
  ...
}
更新脚本
下面创建脚本 autoUpdater.ts 并在主进程文件中引入
import { is } from '@electron-toolkit/utils'
import { BrowserWindow, dialog, shell } from 'electron'
import { autoUpdater } from 'electron-updater'
//自动下载更新
autoUpdater.autoDownload = false
//退出时自动安装更新
autoUpdater.autoInstallOnAppQuit = false

export default (win: BrowserWindow) => {
  //检查是否有更新
  if (!is.dev) autoUpdater.checkForUpdates()

  //有新版本时
  autoUpdater.on('update-available', (_info) => {
    dialog
      .showMessageBox({
        type: 'warning',
        title: '更新提示',
        message: '有新版本发布了',
        buttons: ['更新', '取消'],
        cancelId: 1
      })
      .then((res) => {
        if (res.response == 0) {
          //开始下载更新
          autoUpdater.downloadUpdate()
        }
      })
  })

  //没有新版本时
  autoUpdater.on('update-not-available', (_info) => {
    // dialog.showMessageBox({
    //   type: 'info',
    //   message: `你已经是最新版本`
    // })
  })

  //更新下载完毕
  autoUpdater.on('update-downloaded', (_info) => {
    //退出并安装更新
    autoUpdater.quitAndInstall()
  })

  //更新发生错误
  autoUpdater.on('error', (_info) => {
    dialog
      .showMessageBox({
        type: 'warning',
        title: '更新提示',
        message: '软件更新失败',
        buttons: ['网站下载', '取消更新'],
        cancelId: 1
      })
      .then((res) => {
        if (res.response == 0) {
          shell.openExternal('https://github.com/houdunwang/camera/releases')
        }
      })
  })

  // 监听下载进度
  autoUpdater.on('download-progress', (progress) => {
    win.webContents.send('downloadProgress', progress)
  })
}
安装进度
如果你想将下载进度展示给用户,需要在 autoUpdater.ts 中设置监听脚本,即在有下载事件发生时,触发渲染进程事件
// 监听下载进度
autoUpdater.on('download-progress', (progress) => {
  win.webContents.send('downloadProgress', progress)
})
然后在 preload.js 预加载脚本中配置渲染进程事件
contextBridge.exposeInMainWorld('api', {
	//下载进度条
  downloadProgress: (callback: (progress: any) => {}) => {
    ipcRenderer.on('downloadProgress', (_event, progress) => {
      callback(progress)
    })
  }
})
然后写个 vue 组件展示下载界面,有以下几个特点说明下
- progress.percent 为下载的进度值,100即下载完成
- 使用element-ui 的进度条组件
<script setup lang="ts">
import { ref } from 'vue'

//下载进度条
const progress = ref<any>(null)
window.api.downloadProgress((_progress: any) => {
  progress.value = _progress
})
</script>

<template>
  <main
    class="p-5 w-screen h-screen absolute z-30 flex flex-col justify-center shadow-inner bg-gray-100"
    v-if="progress"
  >
    <div class="flex justify-center">
      <img
        src="../assets/xj.jpg"
        alt=""
        class="w-[80px] h-[80px] object-cover rounded-full shadow-md"
      />
    </div>
    <h1 class="py-3 text-center font-bold opacity-60 text-sm font-mono">下载更新包</h1>
    <div class="">
      <el-progress
        :text-inside="true"
        :stroke-width="26"
        :percentage="parseInt(progress.percent)"
      />
    </div>
    <div class="mt-5 flex justify-center">
      <a
        href="https://github.com/houdunwang/camera/releases"
        target="_blank"
        class="bg-violet-600 py-2 px-4 rounded-md text-white text-sm hover:bg-violet-500"
        >官网下载</a
      >
    </div>
  </main>
</template>
自动化
下面我们使用 Github 的 actions 将项目进行自动打包编译。修改 package.json 设置编译命令
{
  "name": "houdunren-camera",
  "version": "1.0.5",
  "homepage": "https://www.houdunren.com",
  "repository": "https://github.com/houdunwang/camera",
  "scripts": {
    "build:win": "npm run build && electron-builder --win --config --publish never",
    "build:mac-x86": "npm run build && electron-builder --mac --config --publish never",
    "build:mac-arm64": "npm run build && electron-builder --arm64 --mac --config --publish never",
    "build:linux": "npm run build && electron-builder --linux --config --publish never"
  },
}
配置文件
首先在项目根目录创建文件 .github/workflows/build.yml
name: Build App
# permissions:
#   contents: write
on:
  push:
    tags:
      - v*

jobs:
  release:
    name: build and release electron app
    runs-on: ${{ matrix.os }}

    if: startsWith(github.ref, 'refs/tags/')
    strategy:
      fail-fast: false
      matrix:
        os: [windows-latest, macos-latest, ubuntu-latest]

    steps:
      - name: Check out git repository
        uses: actions/checkout@v3.0.0

      - name: Install Node.js
        uses: actions/setup-node@v3.0.0
        with:
          node-version: 16

      - name: Install Dependencies
        run: |
          npm i -g pnpm
          pnpm install

      - name: Build Electron App for windows
        if: matrix.os == 'windows-latest'
        run: pnpm run build:win
        env:
          GITHUB_TOKEN: ${{ secrets.ACCESS_TOKEN }}

      - name: Build Electron App for macos
        if: matrix.os == 'macos-latest'
        run: |
          pnpm run build:mac-x86
          pnpm run build:mac-arm64
        env:
          GITHUB_TOKEN: ${{ secrets.ACCESS_TOKEN }}

      # - name: Build Electron App for linux
      #   if: matrix.os == 'ubuntu-latest'
      #   run: |
      #     pnpm run build:linux-x86
      #     pnpm run build:linux-arm64
      # env:
      #   GITHUB_TOKEN: ${{ secrets.ACCESS_TOKEN }}

      - name: Cleanup Artifacts for Windows
        if: matrix.os == 'windows-latest'
        run: |
          npx del-cli "dist/*" "!dist/*.exe" "!dist/*.zip" "!dist/*.yml"

      - name: Cleanup Artifacts for MacOS
        if: matrix.os == 'macos-latest'
        run: |
          npx del "dist/*" "!dist/(*.dmg|*.zip|latest*.yml)"

      - name: Cleanup Artifacts for Linux
        if: matrix.os == 'ubuntu-latest'
        run: |
          npx del "dist/*" "!dist/(*.AppImage|latest*.yml)"

      - name: upload artifacts
        uses: actions/upload-artifact@v3.0.0
        with:
          name: ${{ matrix.os }}
          path: dist

      - name: release
        uses: softprops/action-gh-release@v1
        if: startsWith(github.ref, 'refs/tags/')
        with:
          files: 'dist/**'
        env:
          GITHUB_TOKEN: ${{ secrets.ACCESS_TOKEN }}
Github
然后在 Github 在你的项目中点击 setting

然后点击 Actions/General
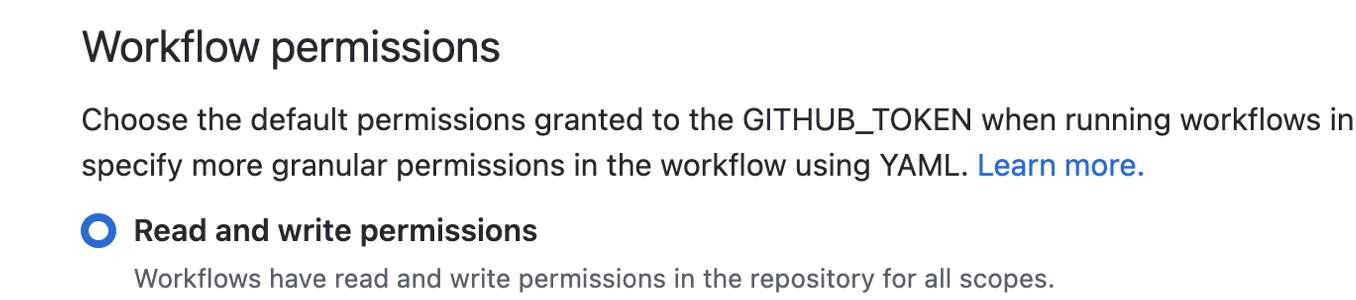
然后修改 Workflow 为读写权限
注意点
壁纸设置
使用 wallpaper 扩展包操作,如果和 electron 结合使用,就不能使用高版本的 wallpaper,因为 electron 不支持 ESM,但高版本的 wallpaper 使用 ESM
pnpm add wallpaper@v5.0.1下面是请求远程图片,并设置为壁纸的主进程代码
import { IpcMainEvent, ipcMain } from 'electron'
import { createWriteStream } from 'fs'
import fetch from 'node-fetch'
import { pipeline } from 'node:stream'
import { promisify } from 'node:util'
import { resolve } from 'path'
import wallpaper from 'wallpaper'

ipcMain.on('setWallpaper', async (event: IpcMainEvent, url: string) => {
  const localFile = resolve(__dirname, '../../wallpaper/' + url.split('/').pop())
  const streamPipeline = promisify(pipeline)
  const response = await fetch(url)
  if (!response.ok) throw new Error(`unexpected response ${response.statusText}`)
  await streamPipeline(response.body!, createWriteStream(localFile))

  wallpaper.set(localFile, { screen: 'all', scale: 'auto' })
})
常用扩展包
- electron-store 主进程持久数据储存