设计弹窗组件
组件需求分析
无论是对话框 Dialog 还是消息弹窗 Notification,都由一个弹窗的标题,以及具体的弹窗的内容组成的。希望弹窗有一个关闭的按钮,点击之后就可以关闭弹窗,弹窗关闭之后还可以设置回调函数。
dialog 组件的使用方法,通过 title 显示标题、通过 slot 显示文本内容和交互按钮,而通过 v-model 就能控制显示状态。需要做的就是控制好组件的数据传递,并且使用 Teleport 渲染到页面顶层的 body 标签
<el-dialog title="提示" :visible.sync="dialogVisible" width="30%" v-model:visible="dialogVisible">
  <span>这是一段信息</span>
  <template #footer>
    <span class="dialog-footer">
      <el-button @click="dialogVisible = false">取 消</el-button>
      <el-button type="primary" @click="dialogVisible = false">确 定</el-button>
    </span>
  </template>
</el-dialog>
像 Dialog 和 Notification 类的组件,单纯想显示一个提示或者报错信息,过几秒就删除,如果在每个组件内部都需要写一个 ,并且使用 v-if 绑定变量的方式控制显示就会显得很冗余。这里就要调用 Vue 组件的新方式:使用 JavaScript 的 API 动态地创建和渲染 Vue 的组件
下面的代码是 Element3 的 Notification 演示代码
<template>
  <el-button plain @click="open1"> 成功 </el-button>
  <el-button plain @click="open2"> 警告 </el-button>
</template>
<script setup>
  import { Notification } from 'element3'

  function open1() {
    Notification.success({
      title: '成功',
      message: '这是一条成功的提示消息',
      type: 'success'
    })
  }
  function open2() {
    Notification.warning({
      title: '警告',
      message: '这是一条警告的提示消息',
      type: 'warning'
    })
  }
</script>
弹窗组件实现
src/components/Notification/notification.vue 组件的主体框架,先不直接写组件的逻辑,而是先从测试代码来梳理组件的功能
<template>
  <div class="el-nofication">
    <slot />
  </div>
</template>

<script>

</script>

<style lang="scss">
  @import '../styles/mixin';
</style>
结合下面的代码可以看到,进入到了内部文件 Notification.spec.js 中
import Notification from "./Notification.vue"
import { mount } from "@vue/test-utils"

describe("Notification", () => {

  it('渲染标题title', () => {
    const title = 'this is a title'
    const wrapper = mount(Notification, {
      props: {
        title
      }
    })
    expect(wrapper.get('.el-notification__title').text()).toContain(title)
  })

  it('信息message渲染', () => {
    const message = 'this is a message'
    const wrapper = mount(Notification, {
      props: {
        message
      }
    })
    expect(wrapper.get('.el-notification__content').text()).toContain(message)
  })

  it('位置渲染', () => {
    const position = 'bottom-right'
    const wrapper = mount(Notification, {
      props: {
        position
      }
    })
    expect(wrapper.find('.el-notification').classes()).toContain('right')
    expect(wrapper.vm.verticalProperty).toBe('bottom')
    expect(wrapper.find('.el-notification').element.style.bottom).toBe('0px')
  })

  it('位置偏移', () => {
    const verticalOffset = 50
    const wrapper = mount(Notification, {
      props: {
        verticalOffset
      }
    })
    expect(wrapper.vm.verticalProperty).toBe('top')
    expect(wrapper.find('.el-notification').element.style.top).toBe(`${verticalOffset}px`)
  })

})
notificatin.vue 接收 title、message 和 position,使用 notification__title 和 notification__message 渲染标题和消息
<template>
  <div class="el-notification" :style="positionStyle" @click="onClickHandler">
    <div class="el-notification__title">
      {{ title }}
    </div>

    <div class="el-notification__message">
      {{ message }}
    </div>

    <button v-if="showClose" class="el-notification__close-button" @click="onCloseHandler"></button>
  </div>
</template>

<script setup>
  const instance = getCurrentInstance()
  const visible = ref(true)
  const verticalOffsetVal = ref(props.verticalOffset)

  const typeClass = computed(() => {
    return props.type ? `el-icon-${props.type}` : ''
  })

  const horizontalClass = computed(() => {
    return props.position.endsWith('right') ? 'right' : 'left'
  })

  const verticalProperty = computed(() => {
    return props.position.startsWith('top') ? 'top' : 'bottom'
  })

  const positionStyle = computed(() => {
    return {
      [verticalProperty.value]: `${verticalOffsetVal.value}px`
    }
  })
</script>

<style lang="scss">
  .el-notification {
    position: fixed;
    right: 10px;
    top: 50px;
    width: 330px;
    padding: 14px 26px 14px 13px;
    border-radius: 8px;
    border: 1px solid #ebeef5;
    background-color: #fff;
    box-shadow: 0 2px 12px 0 rgba(0, 0, 0, 0.1);
    overflow: hidden;
  }
</style>
然后新增测试代码,设置弹窗是否显示关闭按钮以及关闭弹窗之后的回调函数。希望点击关闭按钮之后,就能够正确执行传入的 onClose 函数
it('set the showClose ', () => {
  const showClose = true
  const wrapper = mount(Notification, {
    props: {
      showClose
    }
  })
  expect(wrapper.find('.el-notification__closeBtn').exists()).toBe(true)
  expect(wrapper.find('.el-icon-close').exists()).toBe(true)
})

it('点击关闭按钮', async () => {
  const showClose = true
  const wrapper = mount(Notification, {
    props: {
      showClose
    }
  })
  const closeBtn = wrapper.get('.el-notification__closeBtn')
  await closeBtn.trigger('click')
  expect(wrapper.get('.el-notification').isVisible()).toBe(false)
})

it('持续时间之后自动管理', async () => {
  jest.useFakeTimers()

  const wrapper = mount(Notification, {
    props: {
      duration: 1000
    }
  })
  jest.runTimersToTime(1000)
  await flushPromises()
  expect(wrapper.get('.el-notification').isVisible()).toBe(false)
})
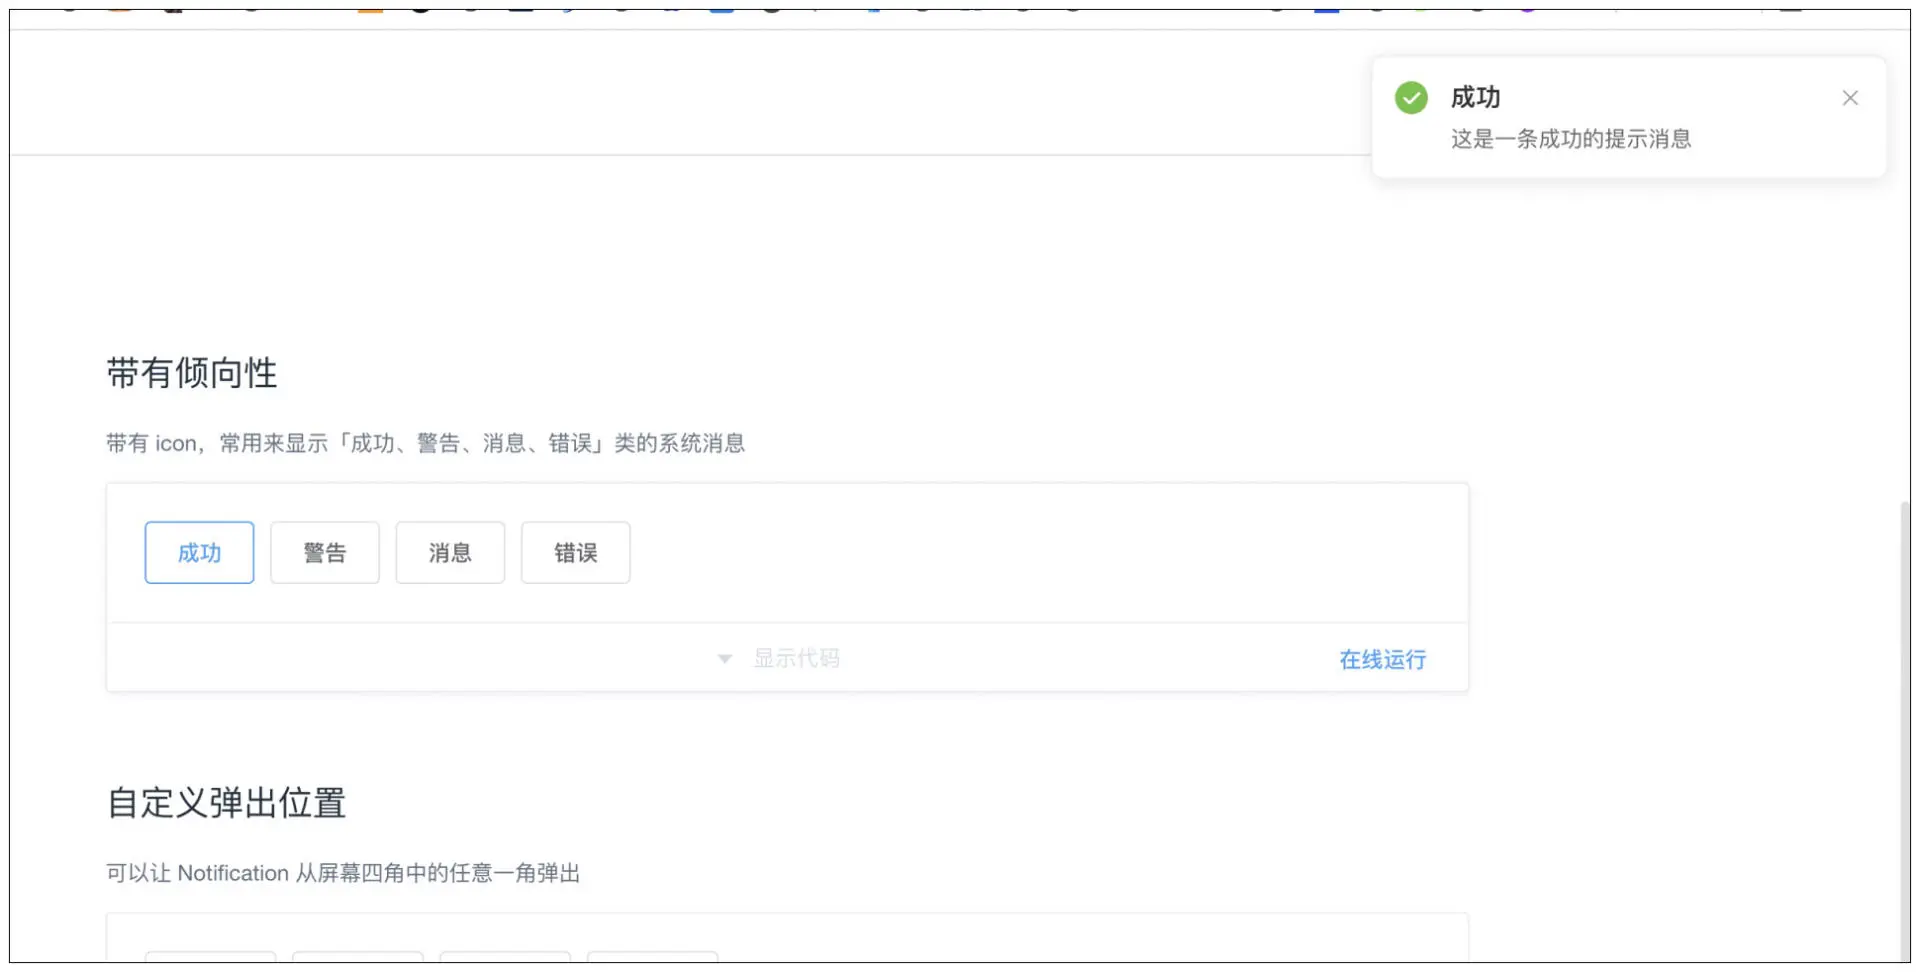
到这里 Notification 组件测试的主体逻辑就实现完毕了,拥有了一个能够显示在右上角的组件,具体效果你可以参考后面这张截图
进行到这里,距离完成整体设计还差两个步骤。
首先,弹窗类的组件都需要直接渲染在 body 标签下面,弹窗类组件由于布局都是绝对定位,如果在组件内部渲染,组件的 css 属性(比如 Transform)会影响弹窗组件的渲染样式,为了避免这种问题重复出现,弹窗组件 Dialog、Notification 都需要渲染在 body 内部。
Dialog 组件可以直接使用 Vue3 自带的 Teleport,很方便地渲染到 body 之上
<teleport :disabled="!appendToBody" to="body">
  <div class="el-dialog">
    <div class="el-dialog__content">
      <slot />
    </div>
  </div>
</teleport>
但是 Notification 组件并不会在当前组件以组件的形式直接调用,需要像 Element3 一样,能够使用 js 函数动态创建 Notification 组件,给 Vue 的组件提供 Javascript 的动态渲染方法,这是弹窗类组件的特殊需求
组件渲染优化
先把测试代码写好,代码中分别测试函数创建组件,以及不同配置和样式的通知组件
it('函数会创建组件', () => {
  const instanceProxy = Notification('foo')
  expect(instanceProxy.close).toBeTruthy()
})

it('默认配置 ', () => {
  const instanceProxy = Notification('foo')

  expect(instanceProxy.$props.position).toBe('top-right')
  expect(instanceProxy.$props.message).toBe('foo')
  expect(instanceProxy.$props.duration).toBe(4500)
  expect(instanceProxy.$props.verticalOffset).toBe(16)
})

test('字符串信息', () => {
  const instanceProxy = Notification.info('foo')

  expect(instanceProxy.$props.type).toBe('info')
  expect(instanceProxy.$props.message).toBe('foo')
})

test('成功信息', () => {
  const instanceProxy = Notification.success('foo')

  expect(instanceProxy.$props.type).toBe('success')
  expect(instanceProxy.$props.message).toBe('foo')
})
现在测试写完后还是会报错,因为现在 Notification 函数还没有定义,要能通过 Notification 函数动态地创建 Vue 的组件,而不是在 template 中使用组件
在下面的代码中使用 Notification 函数去执行 createComponent 函数,使用 h 函数动态创建组件,实现了动态组件的创建
function createComponent(Component, props, children) {
  const vnode = h(Component, { ...props, ref: MOUNT_COMPONENT_REF }, children)
  const container = document.createElement('div')
  vnode[COMPONENT_CONTAINER_SYMBOL] = container
  render(vnode, container)
  return vnode.component
}

function createNotification(options) {
  const instance = createNotificationByOpts(options)
  setZIndex(instance)
  addToBody(instance)
  return instance.proxy
}

export function Notification(options) {
  return createNotification(mergeProps(options))
}
创建组件后,由于 Notification 组件同时可能会出现多个弹窗,所以需要使用数组来管理通知组件的每一个实例,每一个弹窗的实例都存储在数组中进行管理。
用数组管理弹窗的实例。Notification 函数最终会暴露给用户使用,在 Notification 函数内部通过 createComponent 函数创建渲染的容器,然后通过 createNotification 创建弹窗组件的实例,并且维护在 instanceList 中
const instanceList = []
function createNotification(options) {
  ...
  addInstance(instance)
  return instance.proxy
}

function addInstance(instance) {
  instanceList.push(instance)
};

['success', 'warning', 'info', 'error'].forEach((type) => {
  Notification[type] = (options) => {
    if (typeof options === 'string' || isVNode(options)) {
      options = {
        message: options
      }
    }
    options.type = type
    return Notification(options)
  }
})

// 有了instanceList, 可以很方便的关闭所有信息弹窗
Notification.closeAll = () => {
  instanceList.forEach((instance) => {
    instance.proxy.close()
    removeInstance(instance)
  })
}